Complete Drying & Curing Marijuana Guide
Why Do Growers Dry and “Cure” Cannabis Buds?
Harvest time!
Your buds are ready for harvest, yet your job as a grower is not quite over yet. You still need to put your newly harvested buds through the cannabis curing process.
In order to ensure the best quality for your freshly harvested buds, you must prepare your buds with a process known as curing, which involves drying your buds slowly in a controlled environment, then keeping buds in glass jars over the course of a few weeks to let certain natural plant processes occur. The drying/curing process causes buds to smell better and for effects to feel more potent. It also reduces harshness.
Original: Growweedeasy.com
Optimal Drying Environment:
Room Temperature – Around 70°F (21°C)
50% Humidity
Optimal Environment in Jars (Curing):
Room Temperature – Around 70°F (21°C)
58-65% Humidity
Growers cure marijuana buds because they will not achieve their peak potency and quality if they’re uncured. If you started with great genetics and you’ve taken care of your marijuana plants properly during their life, then curing is what makes the difference between “just okay” and trophy-worthy buds.
Dry & Cure Cannabis Properly for Highest Quality Buds
A big part of why buds from medical marijuana dispensaries or cannabis cups often seem so special is they have been expertly dried and cured. People who have never experienced buds prepared this way are often amazed by the smooth, pleasant experience of slow cured buds. Here’s a quick review:
Why Do Growers Dry & Cure Buds After Harvest?
Here’s what drying and curing cannabis properly does for you…
Breaks down chlorophyll and dramatically improves taste / smoothness of buds
Gets rid of the unpleasant “fresh hay” or “cut grass” smell which is common on newly harvested buds
Brings out the subtle flavors and unique smell of your cannabis strain
Reduces “harshness” in buds; you’re less likely to start coughing or get a headache
Buds are less likely to cause anxiety, racing thoughts, or paranoia
Reduces the chance of mold or bacteria growing on your buds
Curing seems to actually increase potency! Read on to learn more…
In most cases, a proper cure will change the subjective effects of buds. There is something that happens during a slow curing process which changes the exact composition of cannabinoids and terpenoids. This changes how buds make you feel.
Try smoking buds directly off the plant vs smoking those same buds after they’ve been dried/cured. The best way to understand the difference is to try it for yourself! 😉
Many growers feel that drying buds slowly and proper curing will actually make buds feel more potent up to a point. Growers also report that properly cured buds are much more pleasant to smoke, vaporize, or turn into edibles. This is likely due to how cannabinoids and terpenoids are altered during the curing process.
So now you may be wondering…
How do you dry your marijuana buds slowly?
How long do you dry your buds for and what’s the best drying method?
How do you cure buds perfectly every time, without leaving anything to chance?
Get the answers right here!
Note: This article covers the tried-and-true steps for traditional curing. This is the most used and well-studied way to cure your buds. However, there are other possible methods including water curing which I personally don’t have any experience with.
Drying & Curing Marijuana: Overview
Curing begins as soon as you cut down your plant. So in order to get the most from curing, you need to master the process of drying your buds.
An important part of the curing process happens during the first few days, as you begin drying your buds. During this initial drying phase, the main goal is to let your buds dry out relatively slowly (usually 3-7 days) while protecting buds against mold and bacteria growth.
Curing starts as soon as you cut down your plant!
Most growers trim their buds and hang them upside down to dry until the outsides of buds are dry and the small stems snap when you bend them. Basically, once your buds will pop off you’re ready to go 🙂
A relatively slow drying process (along with smart curing practices) gives you the best benefits. It doesn’t need to take forever, but any time you “speed dry” your freshly harvested buds you’re losing many of the benefits of curing. However, your buds are still improved by curing even if you overdry your buds or dry them a little too quick.
Note: If you use heat to speed dry your buds (microwave, oven, etc), buds will really taste terrible.
Here’s an overview of the harvest / drying / curing cannabis process. Click for a bigger picture and keep scrolling down for more complete instructions…
Now I will walk you through a step-by-step process so you can produce a professional cure every time, with no guesswork involved.
This method will work for you even if you’re just starting out and have never cured buds before. No matter what previous experience you have curing buds, this will show you how to ensure they come out connoisseur-quality every time.
How to Perfectly Dry & Cure Your Marijuana Every Time
What you need:
Wide mouthed mason jars – 1 quart size. These are sometimes labled as “32 oz” jars.
Place to Dry or Drying rack (optional) – I usually hang my buds from clothes hangers in my closet but you can hang buds from almost anything! String and creativity go a long way 🙂 It’s only recommended to use a drying rack if there’s high humidity or a lot of buds to be dried in a small space, because a drying rack can dry buds too quickly in average humidity conditions.
Hygrometer (optional) – I like the Caliber IV Hygrometer because it easily fits inside quart mason jars. This measures the humidity of the air inside your jar, so you can make sure it’s not too humid or too dry for optimal curing.
Humidipaks (optional) – Boveda Medium 62% packs are cheap and specifically formulated for storing cannabis so it does not dry out or get crispy
Some growers cut the plant down at the base and hang the whole plant upside down to dry. Others will cut off branches and hang them to dry. Still others will cut off individual buds so they can lay them out and dry them on a mesh screen or rack.
How should you cut down your plant?
It’s tough to mess this part up! You can harvest your plant a piece at a time, and I’ve also seen growers trim their buds while they’re still on the plant so they can hang their whole plant upside down to dry.
I personally cut down branches one at a time. Here’s a plant that is halfway through being harvested.
Step 2: Trim away extra fan leaves
Before you start drying your buds, most growers will trim away extra leaves.
At the very least, you should trim away all your big fan leaves, though many growers also trim down the little leaves that grow on the buds.
This improves the appearance of your buds, and will provide a smoother experience. Too much leafy matter can make buds more harsh.
The amount of leaves you trim off is due to personal preference. However, like the last step, you want to leave more if you live in a very dry area. You want to cut off as much as you can if your area is humid, to help speed up the drying process and prevent mold. If it’s very humid where you live than you may consider removing buds from branches while drying.
If Your Humidity Is…
- Dry (Under 30% RH) – You might consider leaving more leaves on your plant while trimming to help slow down the drying process. The more plant matter left behind, the lower the buds dry. For example you could trim your buds but leave extra fan leaves, or possibly even not trim at all until after drying.
- Average Humidity – If you never really notice the humidity where you live chances are it’s perfect for hanging your cannabis upside down to dry 🙂
- Humid (Over 60% Humidity) – If it’s very humid where you live, you might consider actually separating buds from branches after trimming and put them on a drying rack or mesh to help them dry in the high humidity without running into problems with mold (here’s how one grower dried in high humidity)
I recommend trimming your buds while wearing disposable gloves, to prevent your hands from getting covered in sticky resin.
You may want to save your trim (resin-covered leaves or larfy buds you’ve trimmed off). These extra leaves are not good to smoke by themselves, but after being dried, the trim can be processed to make marijuana butter or other cannabis extracts.
Learn how to make cannabis extracts with trim
Right after you harvest your plant, it’s important to start drying your buds slowly, over a couple of days to a week or more.
Step 3: Begin the slow drying process
Why should you dry your cannabis slowly? Drying your buds is the first part of the curing process, and important!
Optimal Drying Environment:
Room Temperature – Around 70°F (21°C)
50% Humidity
Here are some ideas to adjust your environment:
- Air Conditioner – Cools Air & Lowers Humidity
- Evaporative Cooler – Cools Air & Raises Humidity
- Dehumidifier – Heats Air & Lowers Humidity
- Humidifier – Heats Air & Raises Humidity
- Heater – Heats Air & (Usually) Lowers Humidity
Buds which are quick-dried in a dehydrator/stove, via dry ice, or in a microwave taste terrible, smell even worse, and often leave you with a migraine or paranoia. When you quick-dry your buds, you are completely skipping over the most important part of the curing process!
In fact, even drying your buds in mildly hot temperatures, like 85°F (30°C), can burn off valuable smells (terpenes) & possibly certain cannabinoids.
Curing you cannabis properly makes up almost 50% of your final bud quality!
You can take the best cannabis in the whole world but if it’s not cured it’s going to be mid-quality at best!
There are many ways to dry your marijuana buds.
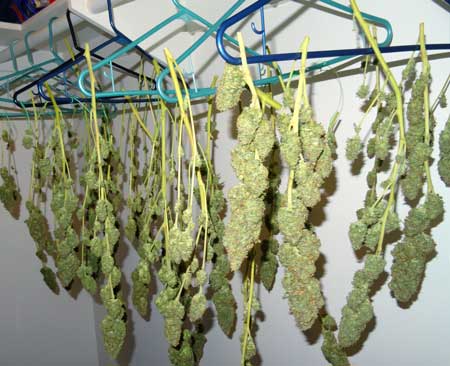
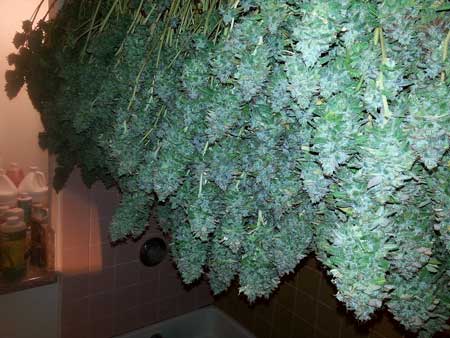
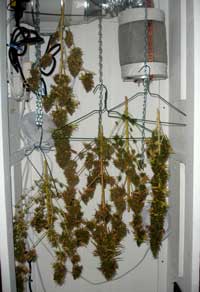
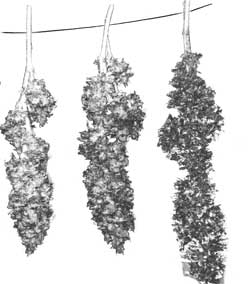
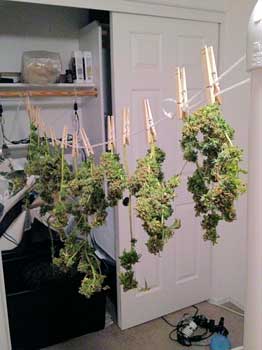
Hanging buds upside down to dry is considered the “standard” way of drying. You can get creative when coming up with ways to hang plants upside down.
You can dry buds by hanging them upside down from clothes hangers, string, almost anything you can think of. You can even hang the entire plant upside down. Personally, I prefer to hang buds upside down for the drying process.
However, you can dry your buds via many different ways!
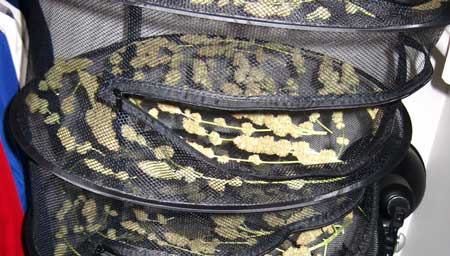
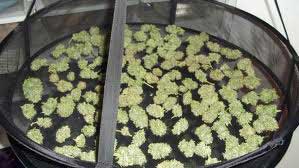 Some growers place their freshly harvested buds on a drying rack as pictured to the right.
A drying rack will dry your buds faster than most of the other methods because the stems are removed from the buds (and the stems contain a bit of water). Using a drying rack is the preferred drying method if you live in a humid area where mold is a problem, if you’re drying a lot of buds in a relatively small space, or if you have huge colas or buds that you’re worried might mold.
You can leave as much or as little stem as you want. The more you leave, the slower the dry.
Some growers dry their buds in paper bags or even by laying them out on cardboard.
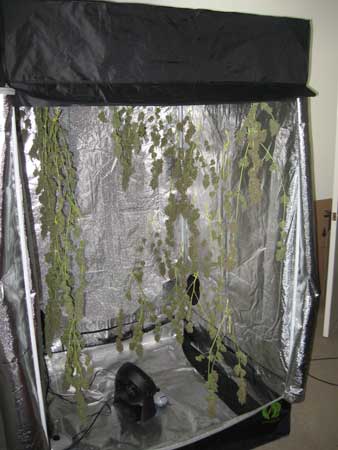
I usually dry my newly harvested buds in my grow tent, or a closet
If you’re laying your buds on something flat like cardboard, it can create wet spots, and will leave an imprint on the sides of your buds where they touched the flat surface. That being said, cardboard can be a way to help people dry buds if they live in a humid environment because it will quickly pull the water out of the buds.
If buds are creating wet spots, you may need to rotate them every few hours so they dry more evenly. This is one of the reasons I prefer to use a drying rack if it’s humid, or hanging buds pretty much any other time.
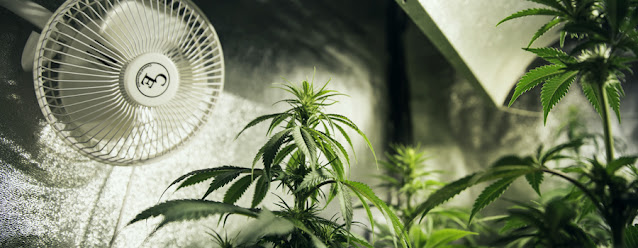
 If buds start to seem wet/soggy, or if you live in a very humid environment, you may need to use a small fan to create extra airflow in the drying area to prevent buds from getting too wet and causing mold. Never point a fan directly at your buds, only point it at a nearby wall. Even then, be careful of drying buds too fast with a fan! You should avoid using a fan unless it’s absolutely necessary because it can easily overdry buds. I’ve overdried an entire harvest by adding a fan before, so use with caution!
For those who live in extremely humid areas (where the high humidity in the air is preventing buds from drying even with a fan), there are more resources at the bottom of this article on how to dry out your buds properly. Learn how one grower was able to dry his buds even with 85-95% relative humidity in his area.
The most important aspect of the drying process is to dry them slowly, and in such a way that it’s easy for you to check on them regularly. So don’t hide them in the back of a closet that’s hard for you to get to. You need to be able to check on your buds every day, and more often is possible (especially during your first few harvests, until you know how buds dry in your personal environment).
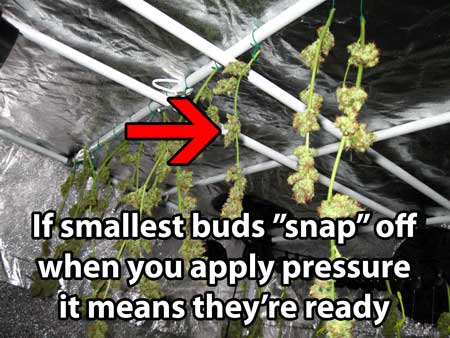
Step 4: Continue drying until outsides of buds feel dry to the touch, and smaller stems snap instead of bend, usually 3-7 days. Buds will “snap” off without leaving a stringy trail.
If buds are dry sooner than 3-4 days, it may mean you’ve dried your buds a little too fast, but that’s okay! Live and learn for next time. It’s difficult to get things exactly right at first because the size and density of the buds, and your environment can vary so much! Even if buds have been dried too quickly, they still benefit from the curing process, but it may take a little longer than normal for buds to be fully “cured.”
If you accidentally remove all moisture from the buds (dry your cannabis for too long), the curing process slows down dramatically, or may even come mostly to a halt. However just like buds dried too quickly, overdried buds will still cure, but it takes longer.
When to jar cannabis buds?
When hanging your buds upside down to dry, your buds are ready to be placed in jars when the outsides of all the buds are completely dry to the touch, but not brittle.The bigger stems will still be bendy but the smaller stems will snap when buds are ready to pull down.
When buds are finished drying, you’ll be able to snap off the smallest buds with your fingers without leaving a “string” of plant behind. “Stringiness” means there’s still too much moisture inside.
Although the buds may feel overdry at this point, if the bigger stems are bendy it means there’s still water hidden inside that will work its way to the outside of the buds during the curing process. This is the perfect time to pull down your buds and jar them.
If you pull down your buds before the smallest stems snap, you’ll find they tend to be too wet once you put them in jars, so you’ll end up having to dry them more anyway. But if you can find a stem that snaps, it’s better to take buds down too early since it’s a lot easier to take water away than add it back.
With drying methods where the buds have been removed from the stems, it’s important to jar buds as soon as the outsides feel dry to the touch, before the buds dry all the way through, since there won’t be any stems to “hold onto” some extra water.
If buds were completely separated from the stems during the drying process, they’re ready as soon as the outsides feel dry to the touch.
It’s ideal to pull buds down at the right time because you can slowly draw out the moisture from the middle of the buds, which allows the curing process to continue. As long as the outside of your buds feel dry to the touch, it is unlikely for mold to grow. Mold generally grows where the outsides of your buds feel moist or damp to the touch.
Some growers choose to sample some of their buds at this point, but be aware that the smell, taste, and potency are not even close to optimal yet. Buds that haven’t been cured are also usually harsh, tend to bother the back of your throat, and give some people headaches. But don’t worry, your bud quality continues to improve as you cure the buds and help break down some of the “bad stuff” that you don’t want in your buds.
Step 5: Place your buds in jars
From this point, your goal is to store your buds in a controlled environment. You want to stabilize the relative humidity at around 60-65% when the buds are placed in an enclosed container. This is the correct environment to cure your marijuana buds to perfection. If you’ve taken your buds down when the smallest stems snap, but the larger ones bend, then chances are your buds will already create the perfect humidity when they’re in the jars.
Optimal Curing Environment (in Jars):
Room Temperature – Around 70°F (21°C)
60-65% Humidity
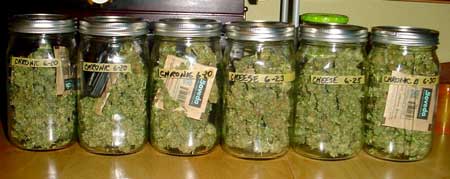
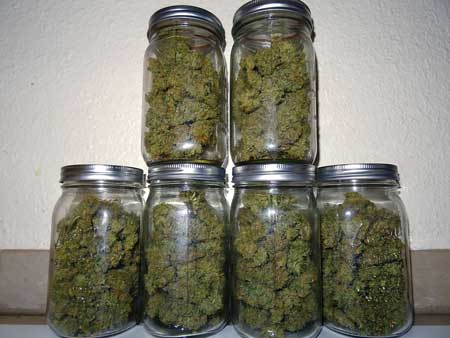
Place your dried cannabis buds in jars for the “curing” process
When the humidity is at 60-65%, your buds will feel completely dry on the outside, but won’t crumble or seem dusty in your hands (which usually means the humidity is too low).
Here’s how to jar your buds the right way every time, without any guesswork on your part.
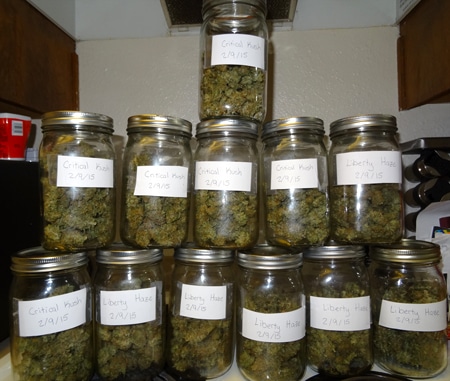
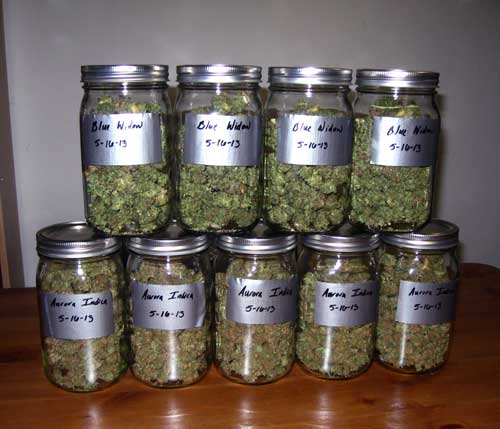
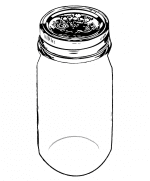 The ideal storage containers for marijuana buds are wide-mouthed glass mason jars. These can be found pretty easily at big grocery stores, most craft stores, online, and at superstores (like Wal-mart). As cannabis cultivation has become more popular, these jars are appearing in more and more stores.
You want mason jars that hold 1 quart (labeled “Quart jars” or sometimes 32oz jars). Each of these jars will hold about an ounce of dried buds (usually about 0.75-1.25 ounces of bud will fit in one jar, but it can be more or less depending on the consistency of your buds).
One-quart glass mason jars have proven to be a great size for proper curing. Bigger jars are more likely to encourage mold – I’ve learned this one from experience 🙁 Other types of jars often don’t seal the right way, which can prevent buds from curing properly. For example, the type of jars that have a rubber seal don’t seem to cure buds right for me. I always use quart-sized glass mason jars, and you’ll see that the majority of growers do the same.
You want to fill each jar 75% full of buds, so there’s still a bit of air at the top. If you shake the jars, you want the buds to be able to move around. If they’re sticking together it means they’re still too wet and you should leave the lids off for a little while to help them dry out.
If buds are sticking together in clumps when you try to shake the jar, it means they still have too much moisture and need to be dried further. Just like when buds are too dry, when buds are too wet they slow down the curing process, but it’s even worse because it can cause mold. Never let buds sit in jars if they feel wet, or even moist on the outside!
Buds should always feel completely dry on the outside, and shouldn’t stick together. If you ever smell “ammonia” it means they’re too wet and bad bacteria is starting to grow
If you notice that any buds feel damp or moist, do not store them in the jars yet! Allow those buds to continue drying slowly until they start to feel dry on the outside before putting them in jars.If they’re already in jars and feel moist, make sure to leave the tops of the jars off until the buds feel dry again.
I know it’s tough to keep them from drying out all the way, yet not putting them in too wet. But if you follow these steps you’ll be able to get it perfect!
How much difference does the humidity inside the jar make?
Check out one grower’s experience with “high humidity” curing vs “low humidity” curing buds!
More on curing buds in anaerobic conditions
Some growers cultivate strongly anaerobic conditions during the drying/curing process on purpose. For example, some indoor growers put their cannabis buds in jars while at least partially wet on the outside, causing extra bacterial growth. Buds cured in very wet conditions look different, smell different and produce different effects, but may be more harsh.
Another real-life example of curing buds in anearobic conditions is some outdoor growers will throw newly harvested cannabis buds in a pile while wet, leaves and all, and allowed it to sort of cook in place like a compost pile. After some amount of time, the buds are wrapped up and compressed for storage, often still partially wet, then cut up into bricks. This is considered a type of “brick weed.”
Example of “brick weed” cured in anaerobic (wet) conditions
Any curing process that involves letting buds stay wet and sealed up at the beginning produces weed with a different consistency and different effects. Buds become crumbly and they lose their green color after just a week or two, becoming more tan or golden. Many people agree that curing in anaerobic conditions can produce bud that is more “harsh” and this type of bud is generally considered “inferior.” To be fair to both sides, there are people I’ve met who prefer this type of cannabis because they like the slightly different effects.
That being said, curing buds while still wet can be unsafe by causing unwanted mold or a bad type of bacteria to grow. If you cure buds while they’re dry on the outside and moist on the inside, as stated in this tutorial, you can achieve the same mental and physical effects of anaerobic-cured weed without the harshness, simply by giving buds a little more time to cure.
If you want to safely get the effects of anaerobically cured bud, all you have to do is cure buds in jars for 2+ months. They start to slowly get a similar appearance and consistency of bud cured in anaerobic conditions, but instead of being harsh they actually get smoother over time. The mental and physical effects of long-cured buds also seems to get stronger as it’s cured longer (up to a point), giving similar heady and body effects that some describe as being a little “drunk.” Long-cured buds gives you the same benefits without the harshness or lack of safety. Because of that, I highly recommend avoiding sealing up buds that feel wet on the outside during the curing process!
Step 6: Curing (first few weeks): Open all jars regularly to inspect and air out buds
During the first few days, you may want to check even more often than once/day, especially if you are worried about mold or bacteria from too much moisture.
It’s important that you’re checking on your buds at least every 24 hours during the beginning stages, as described below. In addition to checking on your buds, it’s also important to open the jars once a day, because buds need fresh air as part of the curing process.
If you smell ammonia or the outside of buds feel moist, it means buds are too wet and need to air out before closing the jars again. If it smells more like cannabis every day, it means you’re doing it right!
For the impatient, this also gives you the opportunity to “try out” your new buds and see how they improve during the curing process 🙂
As mentioned already, the trick to a great marijuana cure is controlling the humidity of the environment. Ideally, you would like to keep your buds stored in an enclosed container with about 60-65%% relative humidity. This is the perfect amount of moist and dry to get the fastest and best curing process.
To be able to get a reading on your current humidity levels (so you can make sure they’re perfect every time), you may want to invest in a tool called a hygrometer.
I like the Caliber IV hygrometer, which is small enough to fit in your curing jars and can be found online for cheap. A hygrometer is more of a luxury than a necessity, though it will take out a lot of the guesswork.
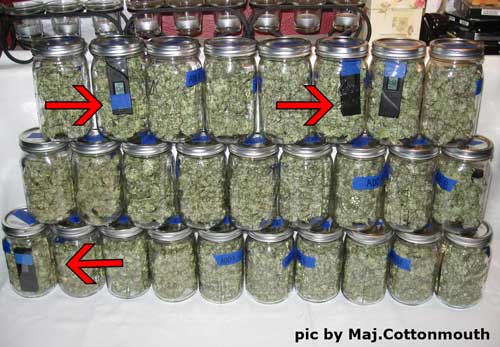
As you can see in this pic, the Caliber IV hygrometers display both the temperature and the relative humidity in each curing jar. (click for a closer look)
Use a hygrometer for pro cannabis curing results, as it will allow you to determine exactly where you are in the curing process and spot possible humidity problems before they affect your buds. Even if you only have one, you can put it in different jars during your daily check to get an idea of the RH (relative humidity) in your jars.
Buds need some amount of time “to sweat” in the jar before you can get an accurate reading of how much moisture is really in the jars. Sometime buds which seemed dry when you put them in will feel damp and soggy when you check them a few hours later. This is because the moisture that was contained in the middle has spread out to the rest of the buds, and it means the buds need to be dried further.
A hygrometer will let you measure the relative humidity within your curing jars most precisely, but I was able to do this process for years without any extra tools just by following the general guidelines below for how buds should look/feel.
Overview of curing cannabis humidity requirements
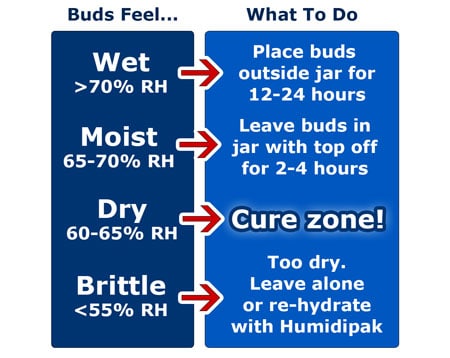
For the first week, you want to air out your jars for a few moments at least once a day. Just open all the jars and close them again once a day. While the jars are open, check on buds to determine the current humidity levels. You may also take this time to shake the jars and move buds around, to ensure there are no moist spots, and buds aren’t sticking together in clumps.
This is what you’re checking for every time you open your jars.

Buds feel wet – Wet buds need to be placed outside the jar to dry for another 1-2 hours. Moist buds should not be touching each other! It is very important you react quickly if buds feel damp to the touch, as this is the most likely time for mold to grow.
> 70% humidity – When buds are too wet, your hygrometer will read greater than 70% relative humidity after buds are in jars with a hygrometer for 24 hours. If buds are very wet, you may see the humidity climb up this high within just a couple of hours. If you see the humidity rising on your hygrometer at a rate of 1% per hour or more, you may want open the jars early, or at least keep a close eye, as your buds are probably too moist.

Buds feel moist – If you shake the jar at this point, you may notice that some of your buds are still sticking together. You’re almost there, but buds are still a little too damp and you’re at risk for mold or anaerobic bacteria. If you live in a normal to dry climate, you may be able to get away with just leaving the top off the jars for 1-4 hours. If you live in a humid climate, you may have to take the buds out of the jars and lay them out until the outsides begin to feel dry again.
65-70% humidity – When buds are slightly moist, your hygrometer will read 65-70% relative humidity after buds are in jars with a hygrometer for 24 hours.

Buds are not wet, but also not brittle – You’re in the cure zone! Your buds may feel a bit sticky to your fingers. Buds should move independently and not clump together in big bunches when you shake the jars.
60-65% humidity – When buds are in the cure zone, your hygrometer will read 60-65% relative humidity after buds are in jars with a hygrometer for 24 hours.
Some growers prefer to keep it a little lower during curing, down to around 55%, especially if they’re curing a whole lot of cannabis, because it helps prevent the chance of mold or “moist pockets” in the jars.
At this point, some growers add a Boveda 62 Humidipak to their curing jar with the buds to help keep the humidity in the correct range during the rest of the cure. (More on Boveda 62 packs below)

Buds are too dry – Buds feel brittle and crumbly. At this point, there is not enough moisture in the jars for the curing process to continue at a normal pace, and buds tend to cure much more slowly.
< 55% humidity – When buds are too dry to continue curing, your hygrometer will read less than 55% relative humidity, even after buds are in jars with hygrometer for 24 hours. If it’s between 55-60%, don’t worry too much! Curing will still take place, just perhaps a little bit slower.
In fact, even if you completely overdry your buds, they will still benefit from the curing process!
Learn more about re-hydrating buds that have been overdried
IMPORTANT: Keep opening all jars at least once/day for first 1-2 weeks of curing
For the first 1-2 weeks, no matter what readings you get, you should continue checking your buds and opening all the jars once a day. Even if buds are too dry, it’s important to air out the buds quickly once a day for this first stage, as they need air to continue the curing process.
Once you are sure buds have been steadily in the cure zone for a few weeks, you may start opening the jars just once/week or even less.
Having Trouble Curing? Want to Prevent Problems During Your Cure? Get Boveda 62 Humidipaks
For those who struggle with curing even after going through all the steps in this curing tutorial, there’s a product known as a “Boveda 62” humidipaks which can help maintain the correct humidity in your jars. These are especially helpful at preventing the humidity from getting too low, even if the humidity is very low where you live. Some growers choose to use these every time they jar their buds to maintain the humidity in the 62% range.
Boveda Humidipaks (62% version) are specifically made for cannabis and can help maintain humidity at 62%, as well as rehydrate buds.
Humidipaks are used to regulate the humidity automatically. They were invented to keep cigars fresh in humidors (which is how they originally got their name), but the company now makes humidipaks that are specifically formulated for storing cannabis at the right humidity (as stated on their website). These are the Boveda Medium 62% Humidipaks.
Note: Boveda is trying to move away from the term “humidipak” these days for some reason, but it’s such a perfect name!
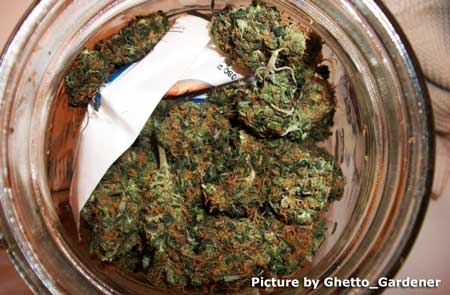
Here’s a picture of buds stored with a humidipak. You simply place the little pouches inside with your buds after they’ve finished drying.
Even when using Humidipaks, it’s important that you follow the rest of the steps outlined in this tutorial to ensure that your cure goes great.
Do you need to get Boveda 62 Humidipaks?
No. If you follow all the steps outlined in this article, you likely will not need Humidipaks. Most growers are able to cure their buds perfectly well without them.
However, they can be helpful if you will be curing your buds in an environment with the incorrect humidity, especially if the air is really dry where you live. They can also be helpful if you’re not used to curing and are afraid of messing it up.
Humidipaks also work very well for long-term storage. When we used them, they didn’t seem to lower the humidity when it was too high in our curing jars, but they did protect buds from drying out.
Will Boveda 62 packs reduce the smell of your buds?

Keep opening all jars at least once/day for first 1-2 weeks of curing
For the first 1-2 weeks, whether or not you’re using Boveda 62 humidipaks, you should continue checking your buds regularly and opening all the jars once a day.
Once you are sure buds have been steadily in the cure zone for a few weeks, you may start opening the jars just once/week or even less.
If you feel like you’ve overdried your buds, don’t panic! Sometimes it feels like buds are too dry even when there is still moisture inside. It’s a good idea to leave buds in jars for at least 2-3 days to see if moisture starts coming to the surface from inside. If buds still feel bone dry after a few days of being jarred, that’s when you might consider rehydrating buds.
Don’t Panic if Buds Are Too Dry!
If you’ve only got household items, trying to re-hydrate buds afterward is risky and probably not a good idea. Re-hydration increases the risk of mold, especially if using something organic, like an orange peel, so use something that’s meant to do the re-hydrating.
Boveda Humidipaks for Re-Hydrating Dry Buds
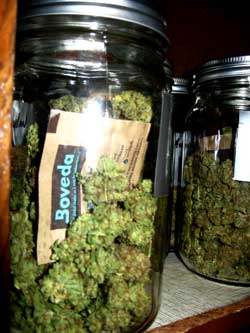 If you’ve been watching buds closely from the beginning, it is unlikely that buds will become over dry. However, if you have over-dried buds, one safe option to at least reduce the brittleness (freshen them up) is to add 62% Boveda Humidipaks to your jars, which will bring the humidity back up to 62% (they don’t work well for reducing humidity though – they can only raise the humidity and keeping it at the 62% level).
These will help slowly infuse moisture back into your buds and won’t affect the taste or increase the chances of mold.
Once the buds have been re-hydrated, you can remove the Humidipak if desired. Some growers have reported that leaving Humidipaks in jars during the first 4 weeks of curing can reduce the taste/smell of buds, though when we used Humidipaks during the curing process we didn’t notice any difference in smell or flavor.
As long as buds remain consistently in the cure zone after several weeks, you can begin to open jars once/month.
Buds will continue to improve from curing for up to 6 months. After 6 months, further curing will not continue to have much effect. At this point, you want to prepare the buds for long term storage to maintain their potency for as long as possible.
For long-term storage (months), buds should be kept in air-tight containers (the wide-mouthed mason jars they’ve been curing in are perfect) and placed in a cool, dark environment.
For serious long-term storage (6 months or more), you may want to consider vacuum sealing your buds, or even better, storing them in your freezer in tightly packed mason glass jars!
Learn How to Store Weed Properly
(so it never loses smell or potency!)
Buds should feel dry and have been curing for at least 3 months before any attempt to store them long term. It is better to err on the side of buds being too dry when you’re going to store buds for a long time without checking on them. Even if buds get brittle, they can be “freshened up” later with a Humidipak.
Properly stored buds can retain a lot of their potency for years
After curing for a year or more after harvest, buds will tend to produce more of a “mellow” effect and will look a lot more beige than green, but other than that the effects stay mostly the same as long as buds are stored properly.

A great way to make sure buds don’t contain extra moisture is to leave your cured buds in unopened jars for a few weeks first, to make sure the humidity reading is completely accurate before your store your buds somewhere you won’t be able to easily check. Adding a Boveda 62 humidipak to the jar will also help keep the humidity where it needs to be!
That’s it! Perfectly cured buds every time!
Case Study on Curing – Average humidity (45-55%)
by GrnMtnGrwr
Here’s how I did it, doing my first dry/cure after reading this technique.
I cut the plants, and trimmed them. All of the drying was done in 45-55% RH and 70-75F. I hung them up in the cabinet I grew them in, lights off, with the ventilation still going. I had some inner air circulation fans during the grow but I turned them off for the dry. They were hanging up for 3-4 days and the outsides of the buds were feeling dried out, but the stems weren’t quite snapping yet.
This is when I stripped the buds off the main stem and put them into jars. The humidity eventually rose to 65-72% so I took the tops off and let them sit. They quickly lowered to the ambient RH, around 55%. I then put the lids back on, and I’ve been doing this for a couple of days now, and they’re slowly stabilizing. I’m extremely confident this will be a great cure.
Case Study on Curing – Very Humid Environment (85-95%)
by Chits
Presently trying this method and results are very good.
Started drying about a week ago. Finally had it down to 68% (not stable though) in the jars, but was not comfortable with it at that point. Looking for around 62%.
Presently we are into a week+ of damp/rainy weather. Ambient air is high 80 to mid-upper 90% RH. a little high for here, but not unusual.
How to get the jar below ambient was an issue for me. So I came up with a test. Here’s what I used:
- 1 gal. glass jar
- 1 lb. white rice
- 1 qt. jar of bud
- 2 paper lunch bags
In the oven at 250 degrees for 45 min. to an hour with the paper lunch bags and rice. Idea is to dry it out as completely as possible.
Once out of the oven, Place bags and rice in gal. jar (loosely capped) to cool.
Okay, now fairly quickly remove contents from jar. Open 1 bag and add rice. Stand it up in the gal. jar. In other bag pour in the buds and install into bag of rice. Slip a hygrometer between outside bag & glass so you can see it’s reading, and seal it all up. May take a bit of persistence to get it right where you want it. But go slow.
While aiming for 62%, when the hygrometer rises to 60% I’ll put the bud back into it’s cure jar and let stabilize. Repeat if needed. The meter will start out really low (being dry) and will rise as it draws moisture out of the bud. Suggest you try and stay right on top of it because it seems to work faster than I expected.
Starting with 72%, made this routine 2Xs and I’m almost perfectly stable at 60-63%. I may go 1 more time, but I’ll let it sit a day or so before determining that.
This was a spur of the moment idea. Seemed to work for a smaller grow anyways and I’m sure something could be changed or modified to be even better (easier/faster?). This was really flying-by-the-seat-of-the-pants as they say. (ie; not very scientific)
Anyways, living in the mold capital of the universe, I had to do something and relatively quickly. Seems to be working fine.
Hope it helps someone else.
Why I’ll never dry marijuana with a dehydrator again
by anonymous
Harvested 2 plants, still have 2 plants to harvest, and I just wanted to post about some lessons learned.
The first plant I water cured. – Submersed in distilled H2O for 7 days, changing the water daily, and leaving the top open for evap, stored in a dark place.
I used a dehydrator (on low setting ~85F) after curing to dry half the buds, and I hang dried the other half.
The ones left to hang dry have a much nicer smell to them, and seem to burn slower than the ones I dehydrated for some reason.
The dehydrator leaves a dried-leaf/earthy smell that I don’t care for, so I will not be using the dehydrator in the future to dry water cured buds. However, with both batches, I can confirm, you get extremely high from water cured bud, plus the taste is fine, and the smell is diminished. Works great for both vaping and smoking.
The 2nd plant, I am air curing. I hang dried half and used the dehydrator for half. The hang dried looks and smells great, the dehydrated weed – not so much. Has that same dried-leaf/earthy smell that I don’t care for. I did not over dry it, it has a humidity of 66% in the jars after 24 hours, and the original smell seems to be slowly coming back, but I’m not sure how things will turn out yet, since I have about 3 weeks left on the cure.
Next time, I will not mess around with the dehydrator for drying, it’s just not worth it to me. Plus, I think this dehydrator imparts a plastic-like smell due to the plastic parts in the dehydrator, which is extremely undesirable. Hopefully the cure will remove these smells and I will get the original smell back.
So obviously, for my next 2 plants, I will just hang/slow dry and either water or air cure. Just not a big fan of the dehydrator.
I actually thought using a dehydrator for the drying process would work out OK, but current results are not agreeing.
Cheers.
Why can’t I quick dry marijuana buds?
Question: What are the cons of quick-drying marijuana?
I want to make it clear that I intend to cure the buds, that’s not the problem. My problem is that I have to move to a new place (where I can’t dry them normally) the day after I harvest. I’m thinking about using the dry ice method, where you dump the buds on a bed of chopped-up dry ice in a covered (with holes!) container.
I know a lot of people say it’s harsher to dry quickly like this — but why? Is it because they are also skipping curing? Is there something happening as it dries?
- What chemical processes are dependent on water? Chemically, what am I missing out on?
- Is a slow dry significantly better than an equivalent cure of quick-dried cannabis?
- Alternatively, if moisture is required for some of the chemical conversions, can you just trim them, vacuum seal them in jars, wait a week (or whatever), and then quick dry them?
Answer:
The curing process begins as soon as you cut down the plants. If you remove all moisture from the buds, it completely stops the curing process. Completely dry buds won’t cure any further. Trying to re-hydrate buds afterwards will not restart the curing process.
Therefore if buds become too dry too fast, curing stops and you lose the taste/smell/potency benefits of further curing.
I know a lot of people say it’s harsher to dry quickly like this — but why? Is it because they are also skipping curing? Is there something happening as it dries?
The curing process actually begins while you’re drying the buds. Drying is just the first part of the curing process and you want to dry your buds as slowly as possible throughout the cure (without mold) for the best results. If you dry buds fast and then try to cure them, it just doesn’t work.
Over the years, I’ve tried many drying and curing methods, and I’ve sampled buds at all stages of the process. In my experience, it’s better to have slow dried buds that weren’t put in jars at all than quick dried buds, no matter how long those quick-dried buds have been curing.
I think part of the benefit from slow drying is the controlled breakdown of green chlorophyll (which makes buds taste terrible), and part of it has to do with chemical changes that happen with the cannabinoids and terpenoids when a certain amount of moisture is present.
You may want to look into water curing for your situation. Water cured buds look weird and have reduced weight and smell, but water cured buds do get the other benefits from curing and will provide an smooth experience.
1. What chemical processes are dependent on water? Chemically, what am I missing out on?
Because marijuana is illegal in many places, there have not been many studies on what happens during the curing process. No one is 100% sure on exactly which chemical processes cause all the benefits of curing, but water seems to be vital for the curing process to occur.
In the past, I’ve dried buds too quickly and tried to “reinvigorate” them with by adding moisture back with Humidipaks. This added a controlled amount of moisture, which made the buds less brittle, but buds never cured even after water was re-introduced.
For some reason the curing process seems to come to a stop once all the moisture is removed from the buds, and is difficult or impossible to restart.
2. Is a slow dry significantly better than an equivalent cure of desiccant-dried cannabis?
Yes. Every time. Even vaping quick dried buds is terrible.
I highly advise against quick drying your buds, ever. I’ve tried quick-drying many ways in my beginning days when I was too impatient, and buds always taste like utter crap. And they gave me a headache. I’ve had to throw away ounces of buds because they were worse than nothing.
Don’t waste a whole harvest this way! You’re much better off harvesting early or late then trying to quick-dry.
Try searching around the net for examples of people who actually quick dry their buds. You’ll see they almost unanimously say they regret it.
3. Alternatively, if moisture is required for some of the chemical conversions, can you just trim them, vacuum seal them in jars, wait a week (or whatever), and then quick dry them?
It might work to vacuum seal the buds and then start the regular dry/cure process when you can. Your biggest fear would be mold.
In your situation, I recommend either harvesting your buds a little early or a little late, so you can dry/cure them properly.
What to do if buds get too dry too fast?
Your marijuana buds feel brittle and crumbly, even if you leave them in a mason jar for 24 hours. That means that your buds are too dry.
At this point, there is not enough moisture in the jars for the curing process to continue optimally. Adding moisture will probably not restart the curing process. Unfortunately, there’s not much you can do as far as curing your buds from this point.
When I’ve over-dried buds, I will generally leave them alone. Trying to re-hydrate them doesn’t do much to continue the actual benefits of proper curing. The most important thing when this happens is to learn from the experience to improve things next time.
One safe option to reduce the brittleness (freshen them up) is to add HumidiPaks to your jars. These will help slowly infuse moisture back into your buds and won’t affect the taste or increase the chance of mold.
With over-dried buds, there’s still hope! They will still benefit from curing in glass jars, but the curing process will take longer than if they contained the right amount of moisture.
Buds in jars are getting too moist, what do I do?
I recently received an email that pretty much summarizes exactly how I felt about drying/curing when I first started growing.
“I’m having trouble with the drying/curing process. I can’t seem to get my buds dry enough, but not too dry, so I can start curing them. I just started drying my very first harvest and yesterday, some of my buds felt so dry that they were starting to get brittle. The stems, on the other hand, were not yet dry enough to snap between my fingers. I wasn’t sure what to do, but I didn’t want to overdry them, so I decided to start curing by putting them into mason jars. Then this morning they feel SUPER moist. It’s like all the moisture that was still in the stems has spread out to the rest of the buds. I’m afraid to dry them more in case they get too dry again, what do I do? Do I just keep them in the mason jars and stir them up regularly to help spread out all the moisture?”
Now if you’re in a situation like this, keep the lid of your curing jar open and you can put your jar of moist buds back into your drying area for about 24 hours. This will keep drying the buds slowly, but won’t dry them out so fast that they get brittle. Keep checking back and put the lid back on when the buds start to feel dry again.
Remember to keep checking your curing buds in case they get moist again. If moisture is allowed to sit in the closed jar, you greatly increase your chances of losing buds to mold. Believe me, there’s nothing worse than losing hard-grown buds to mold from a bad curing job!


